Ysterhout Dot Net
 Setting up for One-Step Crimp
Setting up for One-Step Crimp
These instructions are one way to set your combination seating / crimp die correctly. When it's set correctly, you eliminate bulged cases after bullet seating and crimping.
To navigate the instructions, there are two rows of pictures top and bottom. Start from top left and click on each one through to bottom right.
These instructions do not apply to bullet seating and crimping in 2 steps, where one die is used for seating and a seperate die for crimping.
You may have a 3 station progressive, where you can't have a seperate crimp die, or if you just want the bullet seater / crimper die you have to work properly.
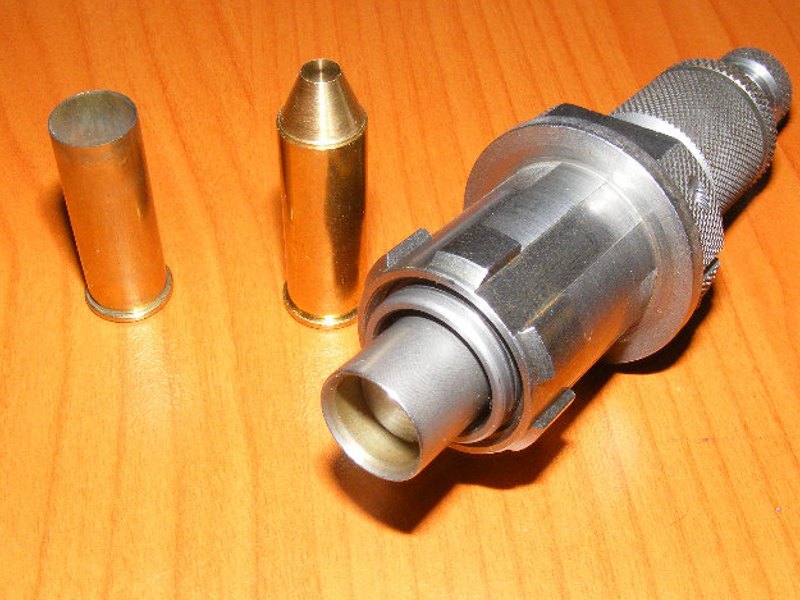
You need one fired case, one loaded round, and your bullet seater / crimp combo die.
If you don't have a loaded round, you need to make one with the correct AOL, and crimp it. In that case, it might be a chicken before the egg scenario, but you need a correct length, crimped round for this.
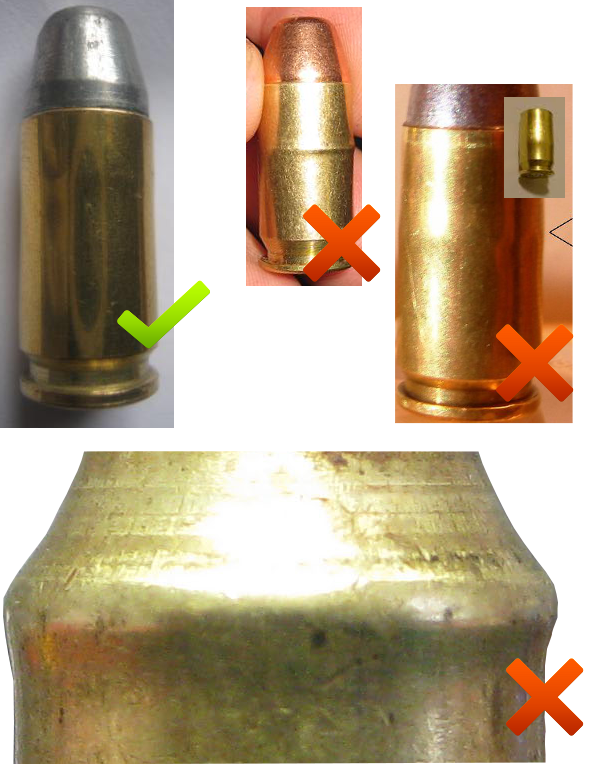
These are the problems that can be corrected with a properly setup one-step crimp.
The top left round is slightly concave on the sides, looking like it's been a bit stretched. This is not what is referred to as bulged, and should not cause feeding or extraction problems.
The two pictures top right show two types of bulges. One is less defined than the other, but both bulge outward, and will cause feeding and extraction problems.
The bottom is a bulged rifle case. You can use this method for rifle as well, just use one empty and one loaded rifle round.
